
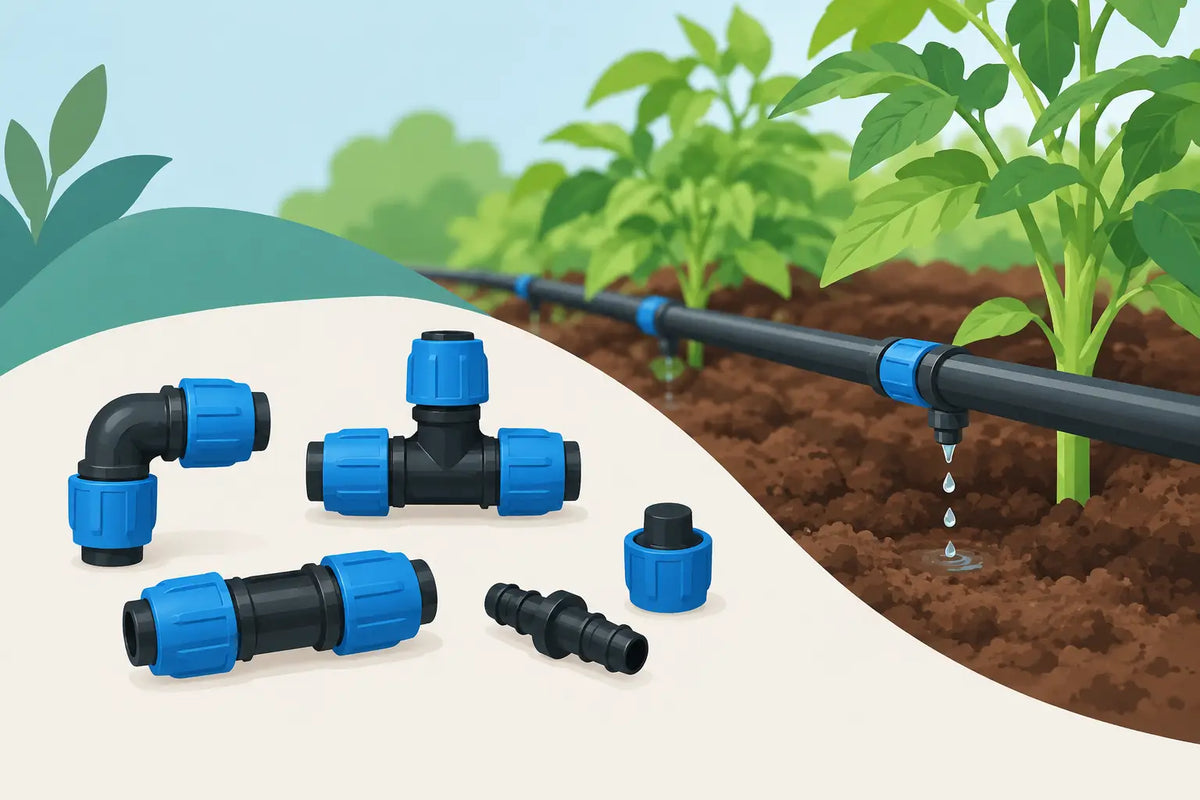
A watering system is only as reliable as the small fittings that join it together. Drip tubing connectors determine where water travels, whether a line can be extended or repaired, and how easily you can alter the layout when planting changes. Choose the right connector at the start and your beds, pots and greenhouse crops receive steady water with far fewer leaks and loose joints.
For most gardens, the key is not buying the largest pack of fittings. It is matching each connector to the tubing diameter, the type of line being built and the pressure supplied by the tap or pump. A simple plan saves time on installation and makes seasonal changes much easier.
Start by matching connector and tubing size
The first check is tubing size. Drip irrigation components are not universally interchangeable, even when two pipes look similar. The difference between an internal and external measurement matters: a connector designed to push inside one tube may be intended to fit over another.
Measure the tubing you already have, or check the product specification before ordering additions. Do not rely on a ruler alone where possible, particularly with older pipe that has softened or stretched. A fitting that feels very tight may split the tube during installation, while one that slides in easily is unlikely to make a watertight seal.
Many home systems use a main supply tube to carry water around the garden, with narrower microtube feeding individual pots, drippers or micro sprinklers. These are different jobs and normally require different fittings. A main-line tee is not a substitute for a microtube joiner, even if both have three outlets.
It also pays to keep compatible fittings together. If you are extending an existing branded system, use connectors specified for that tube where available. Compatible parts can work well, but dimensions and grip designs vary between ranges. For a repair in the middle of a hot, dry spell, a proven fit is worth more than a small saving on the wrong component.
The main types of drip tubing connectors
Every connector has a practical purpose. Selecting by function keeps the system straightforward and avoids unnecessary joins.
Straight joiners for repairs and extensions
A straight connector joins two lengths of the same tubing in a continuous run. It is the fitting to use when a line has been cut by a spade, damaged by frost or needs to reach a new bed. Cut out the damaged section cleanly, then push each end fully onto the joiner.
Straight joiners are also useful when you need to make tubing manageable for winter storage. Rather than lifting a whole long run, separate it at a planned joint and label each section. Avoid adding joiners simply to use up short offcuts, however. Every additional connection is another point that needs checking.
Tees and crosses for branching lines
A tee splits one run into two. It suits a main tube travelling along a border with a branch heading across to a second row of plants, or a greenhouse line supplying both sides of a central path. Position tees close to the branch point rather than stretching small tube across walkways.
A cross creates four directions and is useful at the centre of a rectangular bed or where several short branches meet. It can reduce the number of fittings required, but it is not always the neatest choice. Two tees often provide more control over routing and leave room for future alterations.
Elbows for corners and tidy routing
An elbow turns tubing through 90 degrees without forcing a sharp bend. Kinked pipe restricts flow and can put strain on a fitting, especially in colder weather when tubing is less flexible. Use elbows around raised beds, along greenhouse staging and at square corners where a clean layout matters.
Tubing can make gentle curves without a connector. Save elbows for true corners or places where the line repeatedly tries to spring out of position. Stakes help keep a curved line where it belongs without introducing more joints.
End stops and flush ends
Every open run needs an end closure. An end stop provides a firm finish for a permanent or semi-permanent line. A removable flush end is often more useful on longer systems because it lets you open the pipe and clear debris at the start of the season.
Flushing is a sensible routine after installing a new layout, after winter storage and if drippers begin to block. Open the ends, run water until it is clear, then refit the closures. This simple job prevents grit from reaching smaller outlets.
Take-offs and microtube connectors
A take-off fitting creates a small outlet from the main tube, allowing microtube to run to a pot, hanging basket or individual plant. It is ideal where containers are spaced unevenly or need different dripper positions. Use a proper punch to make clean holes in the main pipe. A screwdriver or nail can create an oversized hole that will not hold the fitting securely.
Microtube joiners, tees and elbows allow you to shape those smaller delivery lines. Keep microtube runs reasonably short where possible. Very long, fine runs can deliver less water at the far end, particularly if several are supplied from one take-off.
Planning drip tubing connectors around the garden
Before cutting anything, walk the route from the water source to the furthest plant. Mark the main tube route, then identify where branches, corners, container feeds and end closures will be needed. This takes only a few minutes and prevents the common mistake of finishing a run one connector short.
Build the main line first. It should follow practical access routes, such as the edge of a border, the side of a path or beneath greenhouse staging. Leave enough slack for seasonal movement, but do not leave loose loops where a mower, fork or foot can catch the pipe.
Next, add branches and take-offs. Group plants with similar watering needs where you can. Tomatoes in a greenhouse, thirsty pots in full sun and established shrubs in open ground should not necessarily receive the same amount of water just because they sit on the same line. Connectors control the route; drippers, adjustable outlets and timers control the delivery.
If the system covers different levels or a large area, check pressure and flow before adding more outlets. A pressure reducer may be required for drip components, while a longer layout may need separate zones. Adding more connectors will not solve a pressure issue, and it can make uneven watering harder to diagnose.
How to fit connectors without leaks
Cut tubing squarely with suitable cutters or sharp secateurs. A crushed, angled end can prevent the pipe seating evenly on the connector. In cool weather, warm the tubing briefly in a bucket of warm water or leave it in a sunny spot before fitting. It becomes more pliable without needing excessive force.
Push the tube fully onto the barbed connector until it reaches the stop or sits firmly over the full grip section. A partly fitted joint may appear secure when the water is off, then lift under pressure. Do not use glue, tape or sealant on standard push-fit irrigation connectors. They can interfere with the fit and make future repairs difficult.
Once the layout is complete, run the system for several minutes and inspect every joint. Look for drips, spray from a poorly seated take-off and tubing that has worked loose at bends. Make adjustments before covering lines with mulch or fixing them beneath greenhouse benches.
Common connector problems and practical fixes
Leaks at a joint usually come down to one of three causes: incorrect tubing size, a damaged pipe end or a connector that is not fully inserted. Remove the fitting, cut back to clean tubing if there is enough length, and refit. If the tube has gone hard or split around the connection, replace that section rather than trying to patch it.
A branch with little or no flow may be kinked, blocked or connected to an overworked main line. Check the simple causes first: straighten the tube, open the end and flush it, then inspect drippers and filters. If the issue affects the far end of a large system, divide the layout into zones or reduce the number of outlets running at once.
Take-offs can leak if the original hole is too large. In some cases, moving the take-off a short distance along the tube and sealing the old hole with a suitable blanking plug is the cleanest repair. Keep a small selection of joiners, tees, end stops and blanking plugs on hand. They are inexpensive parts that can keep a watering system working when plants need it most.
A well-planned set of connectors gives you more than a route for water. It gives you a system that can grow with the garden, adapt when pots move, and be repaired in minutes rather than abandoned after one leak. Check your tubing size, buy fittings for the actual layout, and leave yourself a few spare parts for the changes that every productive garden eventually demands.